
Everything I need to know to start my (first) QandR session
Aside for a moment
Go to your QandR dashboard in a modern browser — such as Chrome, Edge, or Safari on Mac — using this link: dashboard.qandr.eu.
Check out the onboarding guide for a walkthrough of the dashboard.
In QandR, you start by creating a project.
A project contains the structure of your group conversation: the slides, formats, and settings you prepare in advance. Within that project, you can then run as many sessions as you need.
To get started, go to your dashboard and click NEW PROJECT. Give your project a clear name, then open it in the project editor. There, you can add the slides and interactive formats you want to use.
Once your project is ready, you can start a session from the dashboard whenever you need it.
If you want more guidance, the onboarding will walk you through the first steps.
Bij het gratis proefaccount krijg je:
During your presentation, participants can submit questions or comments via their phone. These are linked to the slide that is currently on screen.
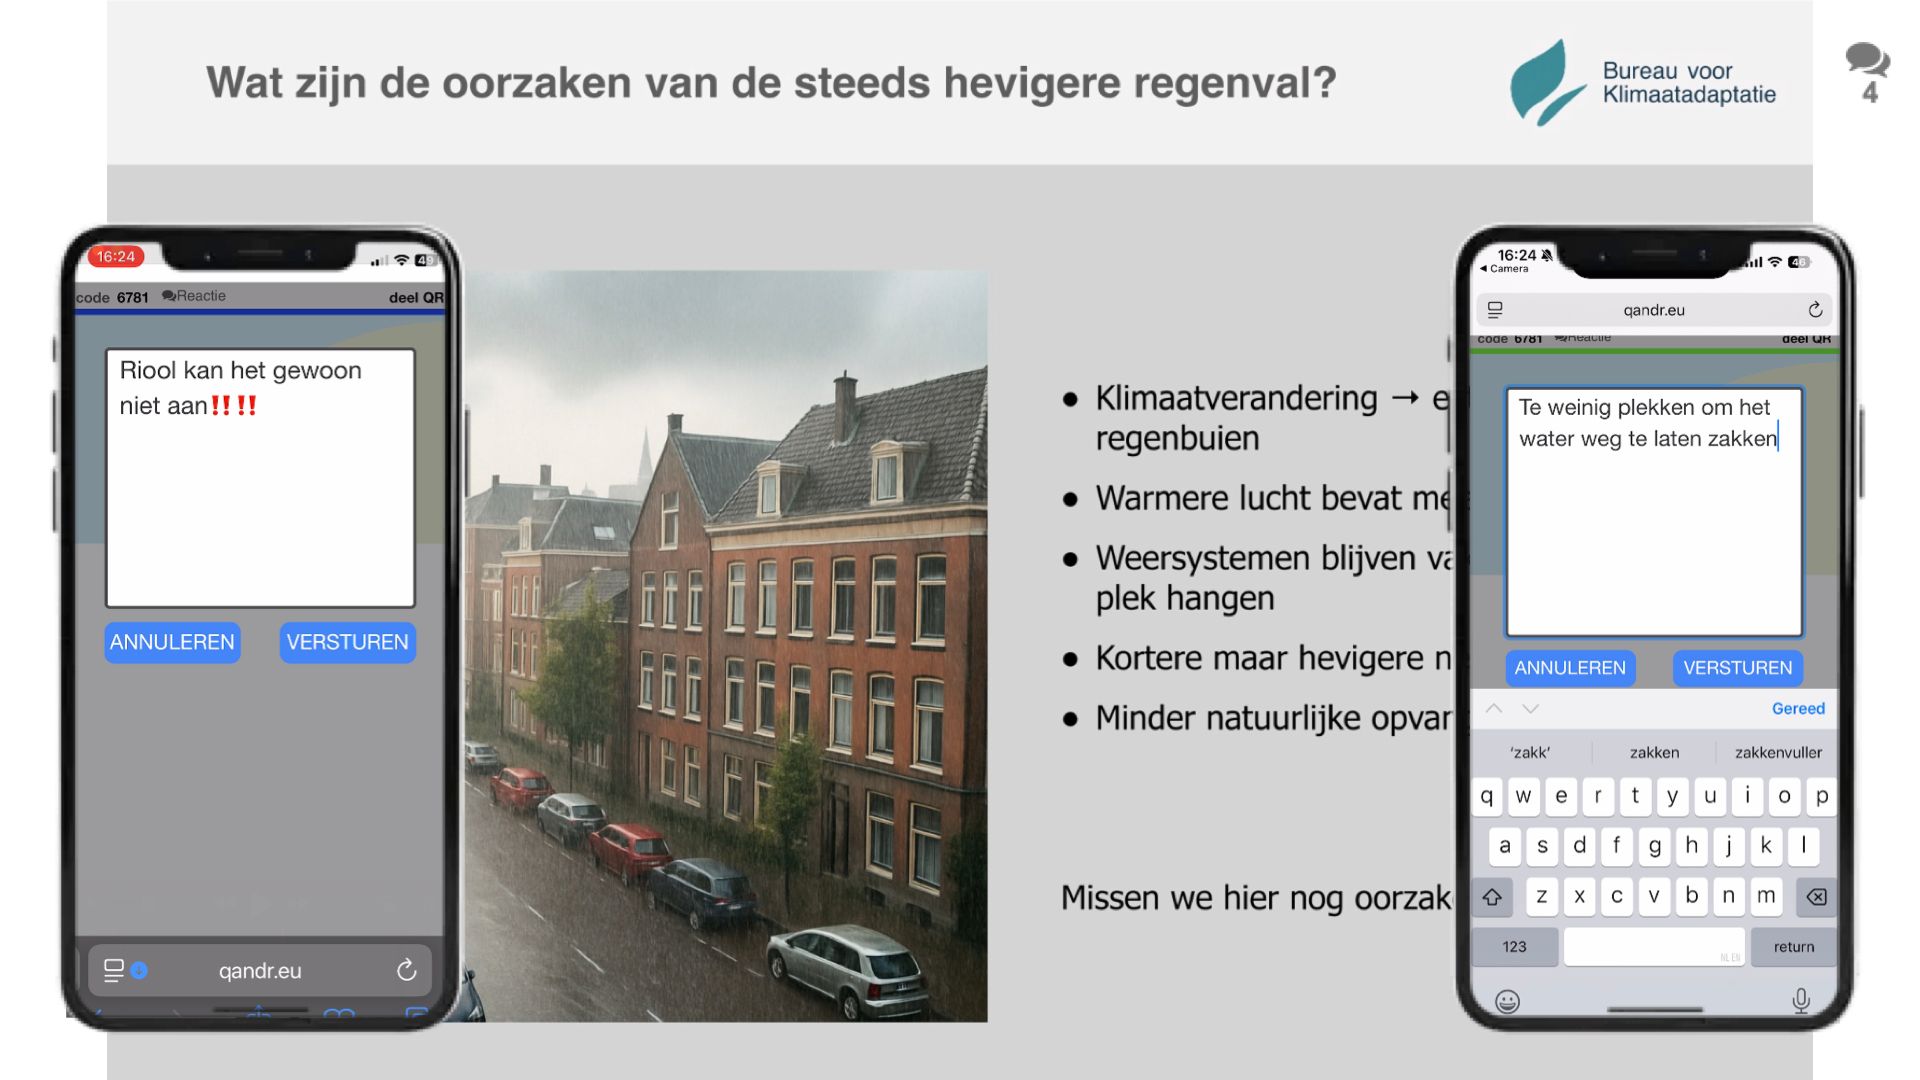
The questions remain hidden while you present. You can open them at any moment via the Qboard icon, for example to address them during or at the end of your presentation.
This allows you to collect input continuously, without interrupting your flow.
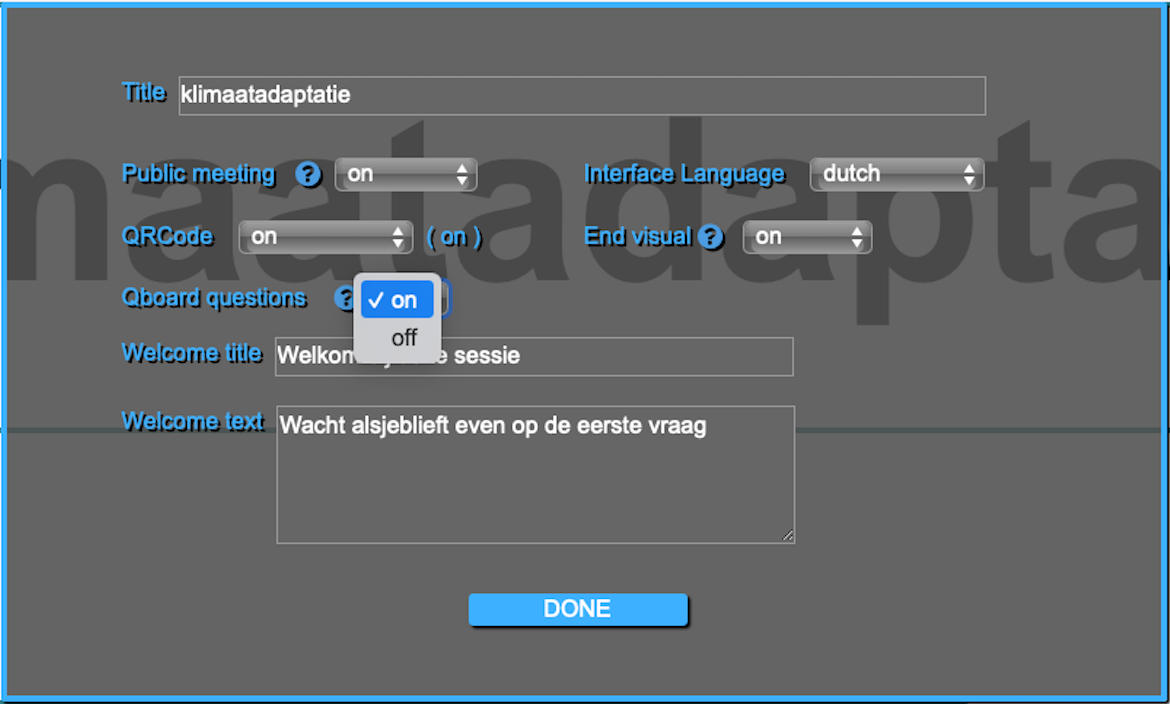
Qboard can be enabled or disabled for each project via a setting in the editor of your QandR's opening slide (see screenshot).
For more information, click here, or download the Qboard manual.
QandR does not have a built-in slide editor. You add slides by uploading images (PNG or JPG). Want to upload multiple slides at once? Put them in a PDF file and upload it in one go. QandR will automatically split the PDF into individual slides. Note: QandR does not support direct upload of PowerPoint or Keynote files. Export them first as images or a PDF.
Yes, you can combine QandR with presentation tools like PowerPoint or Keynote.
A simple way is to open your presentation and QandR in separate windows or tabs, and switch between them during your session. This allows you to keep your existing presentation while adding interactive moments with QandR.
If you prefer a more integrated setup, you can export your presentation as a PDF and upload it into your QandR project. QandR will automatically turn each page into a separate slide, so you can run your entire session from within QandR.
When you use this integrated approach, you can also use Qboard alongside your slides to collect questions or comments from participants during your session.
You can change the language that participants see during your session.
Click the gear icon in the top right corner of your dashboard to open the settings window. There, you can select your preferred language under “Default interface language”.
This setting determines the language of the participant interface during your sessions.
Please note: the facilitator dashboard itself remains in English.
Yes, it’s always a good idea to test your session before going live.
By running through your session once, you can check if everything looks and works as expected — both on the main screen and on a participant’s phone. This helps you see whether your questions are clear and your flow makes sense.
It’s best to also join your own session on a phone, and if possible, test it together with a colleague. A fresh perspective often helps to spot things you might miss yourself.
Don’t worry about the results from your test session — these are only part of that session. When you start a new session, you begin with a clean slate.
Sharing a QandR project is simple.
In your dashboard, select the project you want to share and click the share icon in the top right corner. Then select one or more colleagues to give them access.
They will find the project in the “Shared with me” section of their QandR dashboard.
Sharing a project makes it easy to collaborate. For example, one person can prepare the session while another facilitates it. It’s also useful if you want to run multiple sessions at the same time from different accounts.
For more information, click here.
Copying a QandR project is simple.
In your dashboard, select the project you want to copy and click the copy icon in the top right corner. Give the new project a name, and a duplicate will be created.
This is useful when you want to reuse the structure of a session, for example for a new group or a similar session.
For more information, check the onboarding or
video tutorial.
Yes, this is possible with the editor (use E key to open editor). Just navigate to the first visual and use the little pen in the editor to change the title
Yes, you can. Go to the Settings in your QandR dashboard (gear icon top right), and click Create to generate a fixed QR code.People can scan that code to participate in any of your sessions. If no session is active yet, that see a waiting screen on their phone. As soon as the sessions starts, they are logged in automatically.
Read on for more details.
A smooth session starts with good preparation.
Always test your session at least once before going live. This ensures that all images — which can be quite large — are loaded in advance and stored in your browser and QandR cache. This helps prevent delays during your session.
It’s also important to test the participant experience. Join your own session on a phone to see how questions and interactions appear on the participant side.
If possible, run a short test with a colleague. They can give you a fresh perspective and help you check whether your questions and instructions are clear and easy to understand.
Also consider the practical setup. Make sure the internet connection at your location is stable, and consider opening your session in advance so participants can already join as they enter the room.
You can share the QR code shown on the session start screen, which is unique for each session. If you want to prepare in advance, you can also use the Presenter QR code from your dashboard. This code always works for your account and can be printed or shared beforehand.
Keeping things simple and testing in advance helps you stay focused on the conversation, instead of the technology.