All ins and outs of a live QandR session
During the session
Normally, you’ll start your session from the QandR dashboard shortly before it begins. It can be useful, however, to open it a little earlier so participants can already log in as they arrive. You can even set up the session well in advance if you prefer. Starting a session is simple: select your project in the dashboard and click START SESSION. You may choose to give your session a name (to make it easier to find later in the dashboard), but in practice most users rely on the session number, which works just fine. The ‘cast to’ dropdown can be left as is — this is only relevant for advanced setups with multiple screens, which QandR also supports.
Next, click OPEN MAINSCREEN to launch the session. The welcome screen will appear, where participants can log in.
For more details, check out the onboarding guide or watch the video tutorial.
Participants don’t need to install an app or create an account.
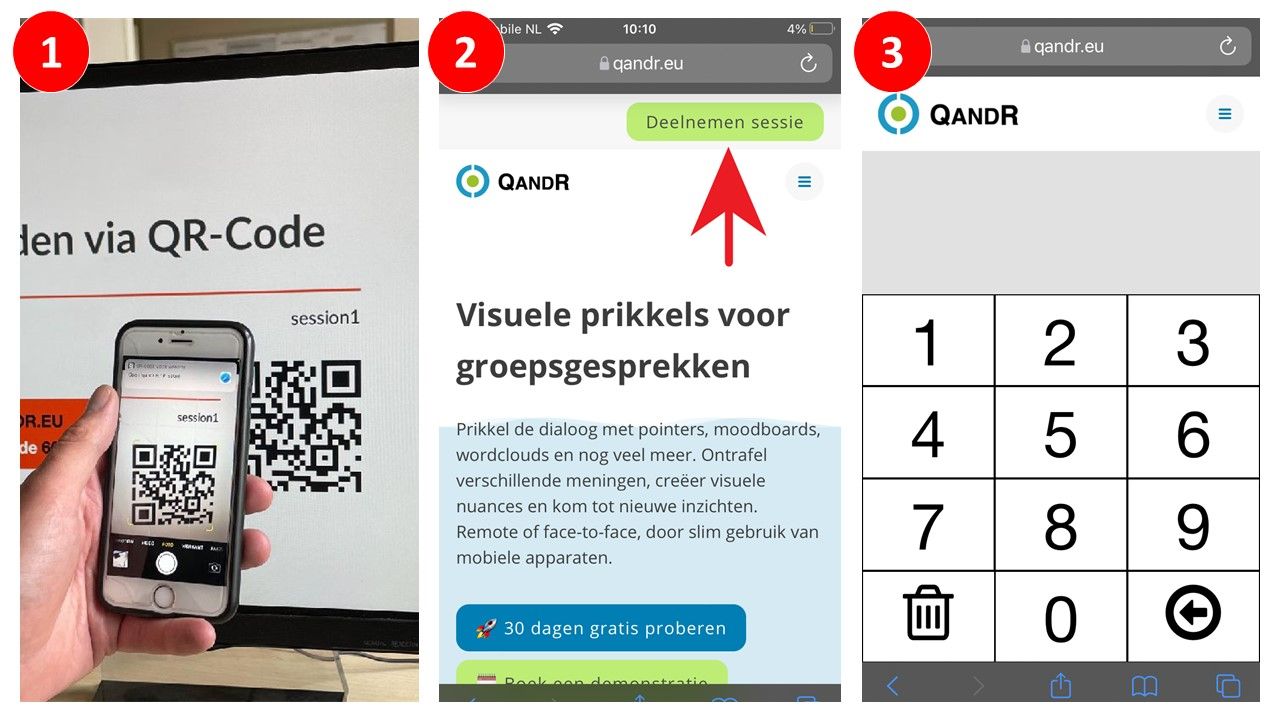
They can participate in a Live session in 3 ways:
1- Through the QR-Code: At the beginning of a Live session. By scanning the code with a phone you can participate directly. For more information click here.
2- Through the green button "Participate session": This will open a type pad on the phones where you can enter the code from the main screen.
3- Through the link: For desktop: www.qandr.eu/nl/deelnemen. For mobile: www.qandr.eu. As with option 2, the code on the main screen must be entered.
Click on the gear icon at the top right of your dashboard. A pop-up window will appear. Check the checkbox that says: Show QR code on title page. For more information click here.
You decide which activity to activate. Participants respond on their smartphones, and the results appear instantly on the screen. Normally, you just move on to the next slide, but you can also jump to any slide by opening the navigation bar on the left with the E short key. Select the slide you want and click on it.
By default, up to several hundred participants can join a session. For larger groups, you can contact our support team. Depending on your subscription, there may be a maximum number of participants.
Ask the participant to open the link again in a different browser (preferably Chrome or Safari). Often, refreshing the page also helps.
Yes, you can. QandR is regularly used in online sessions, especially since the Corona crisis. Just share the main screen of QandR in your video conferencing system and you can get started.
Yes, you can. Go to the Settings in your QandR dashboard (gear icon top right), and click Create to generate a fixed QR code.People can scan that code to participate in any of your sessions. If no session is active yet, that see a waiting screen on their phone. As soon as the sessions starts, they are logged in automatically.
This reduces clutter for even the least digitally able and works very well in scenarios where a session has to remain open for an extended period, e.g. at walk-in events. As moderator, you make sure to print out the QR code or display it somewhere obvious (you can enlarge the code in your dashboard).
Participants walk in, scan the code, and automatically join the session.

Yes, it can. You leave your QandR session open during the event. You get people to log in using a fixed QR-code. That is a special code that you generate once to be used in any of your sessions. People can scan that code to participate in one of your sessions. If no session is active yet, they see a waiting screen on their phone. As soon as the sessions starts, they are logged in automatically.
Go to the Settings in your QandR dashboard (gear icon top right), and click Create to generate a fixed QR code. As moderator, you make sure to print out the QR code or display it somewhere obvious (you can enlarge the code in your dashboard).
Participants walk in, scan the code, and automatically join the session.
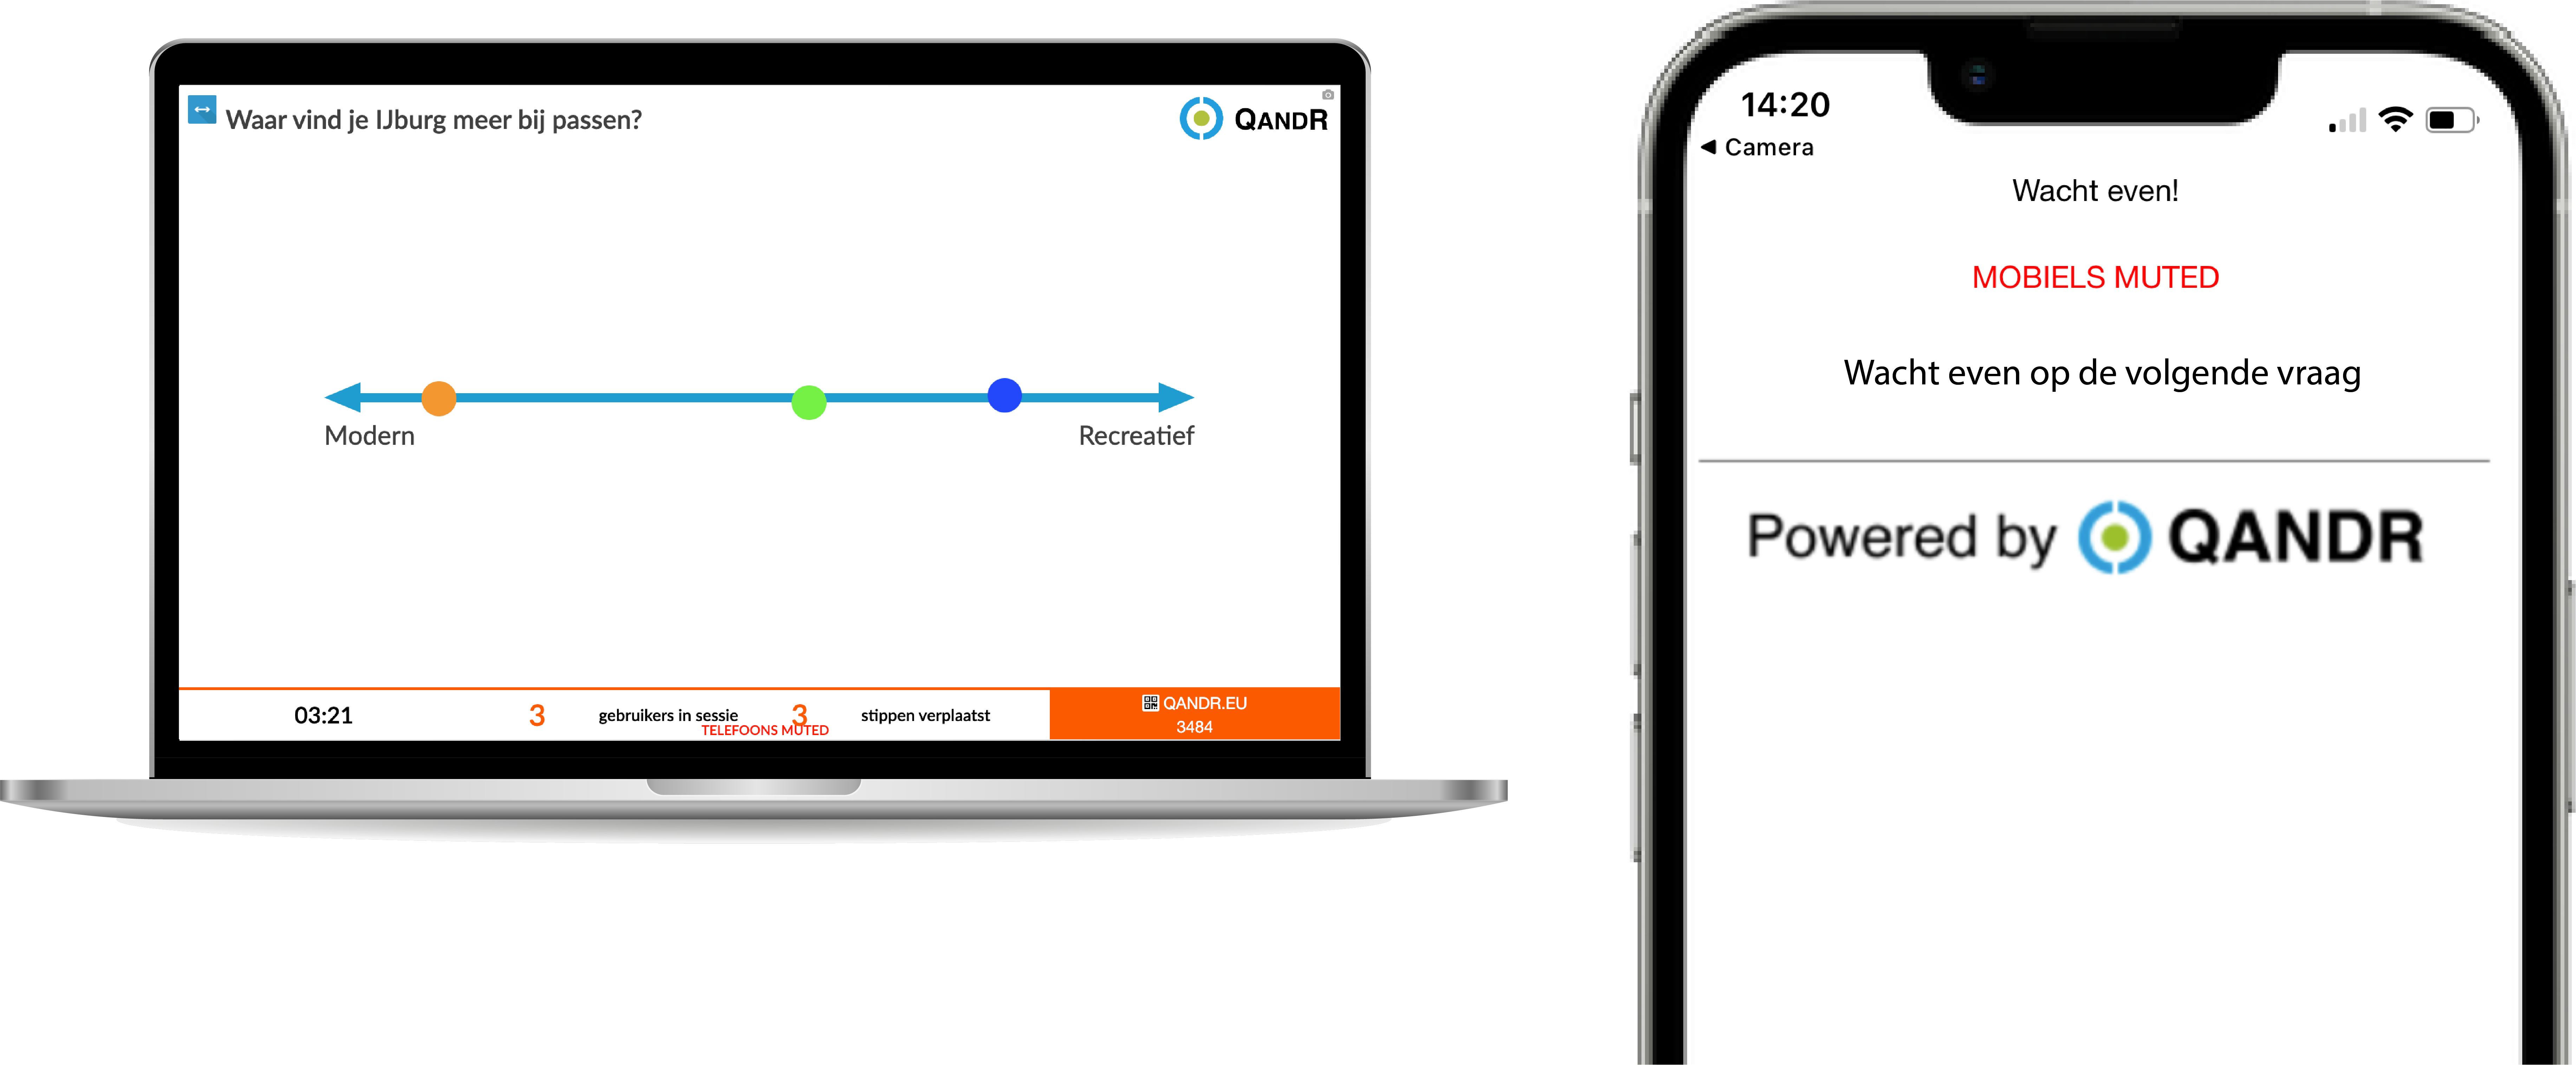
Yes, you can. In qualitative research, it is often a requirement that respondents first answer the question for themselves and then discuss their own and others' answers. To achieve this situation, most QandR modules have a so-called 'no-peer-influence' option that can be turned on in the editor. When this option is checked, the main screen will give an indication that people are answering, and how many, but the moderator will have to do a reveal before the answers appear on the main screen. You can view a clip of a video tutorial showing how to set no-peer influence from within the editor.
The no-peer influence option is currently available for the Poll, the Wordcloud, the Grading and the Moodboard, the Dilemma and the Quadrant. You can activate it in the editor by checking the 'no peer influence' box.
Yes, you can. You can use either the 'M' of Mute or the 'P' of Pause on the keyboard to do so.
If you want to run multiple sessions at the same time you will have to work with multiple facilitator accounts.
Step 1 - Create the project
Step 2 - Share the project with a colleague that has a QandR account, see https://www.qandr.eu/en/pages/151/Session-archives/
Step 3 - You colleague will find the project in his dashboard under 'shared with me'
Step 4 - Repeat with other colleagues as required
Step 5 - You and your colleagues each start a session on their own account so sessions run simultaneously
Please test it well before the actual sessions so you are all familiar with the way it works.
Click on the gear icon at the top right of your dashboard. A pop-up window will appear. Then check the checkbox where it says: interface language for all my projects.